Text & Typography
Text
To insert text you have to activate the text tool by first clicking on the icon at the toolbar or pressing T. Then you have two ways to create a text layer:
- Click to create a textbox without any specific dimensions.
- Drag to create a textbox with a fixed size.
Tips for resizing
- Double-click on the right side of the bounding box to set the resize setting to auto-width.
- Double-click on the bottom side of the bounding box to set the resize setting to auto-height.
Edit and style text content
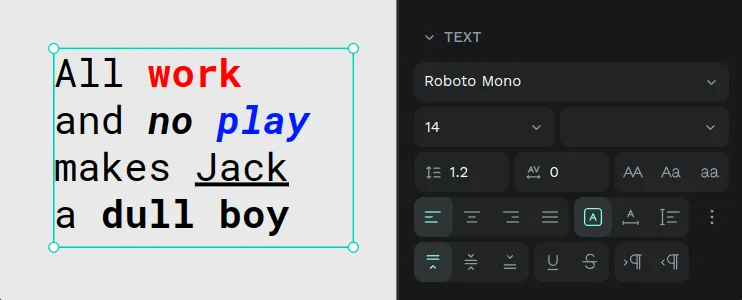
Press Enter with a text layer selected to start editing the text content. You can style parts of the text content as rich text.
Text options
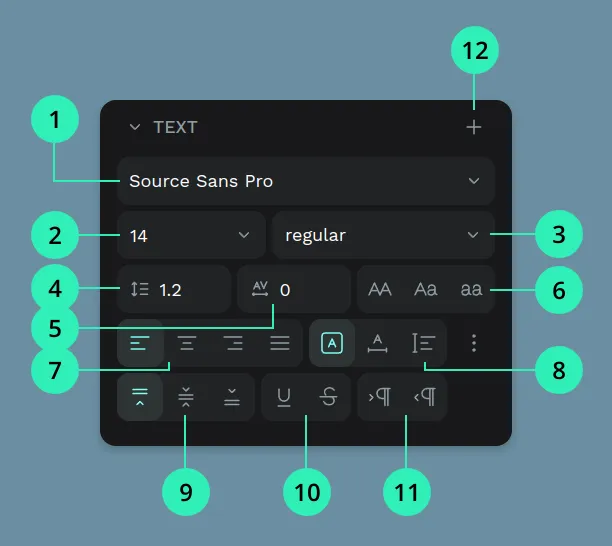
- Font family. Penpot includes by default the Google Fonts cataloge. You can also install your own fonts.
- Font size.
- Font type.
- Line height (in pixels).
- Letter spacing (in pixels).
- Text case: none, uppercase, lowercase, titlecase.
- Horizontal alignment: left, center, right, justify.
- Sizing: auto height, auto width, fixed size.
- Vertical alignment: top, center, bottom.
- Decoration: none, underline, strikethrough.
- Direction: LTR (left to right), RTL (right to left).
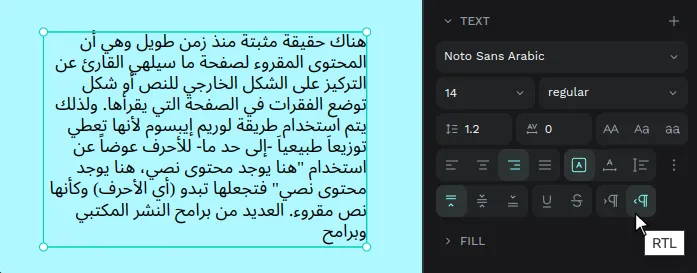
RTL support
Diversity and inclusion is a major Penpot concern and that's why we love to give support to RTL languages, unlike most design tools.
If you write in arabic, hebrew or other RTL language text direction will be automatically detected in text layers.
Custom fonts
If you have purchased, personal or libre fonts that are not included in the catalog provided by Penpot, you can upload them from your computer and use them across the files of a team.
Upload local fonts
To use a font that you have on your local machine, first you need to upload it to the Penpot team where you want to use it.
You can find the “Fonts” section in the dashboard menu, at the left sidebar.
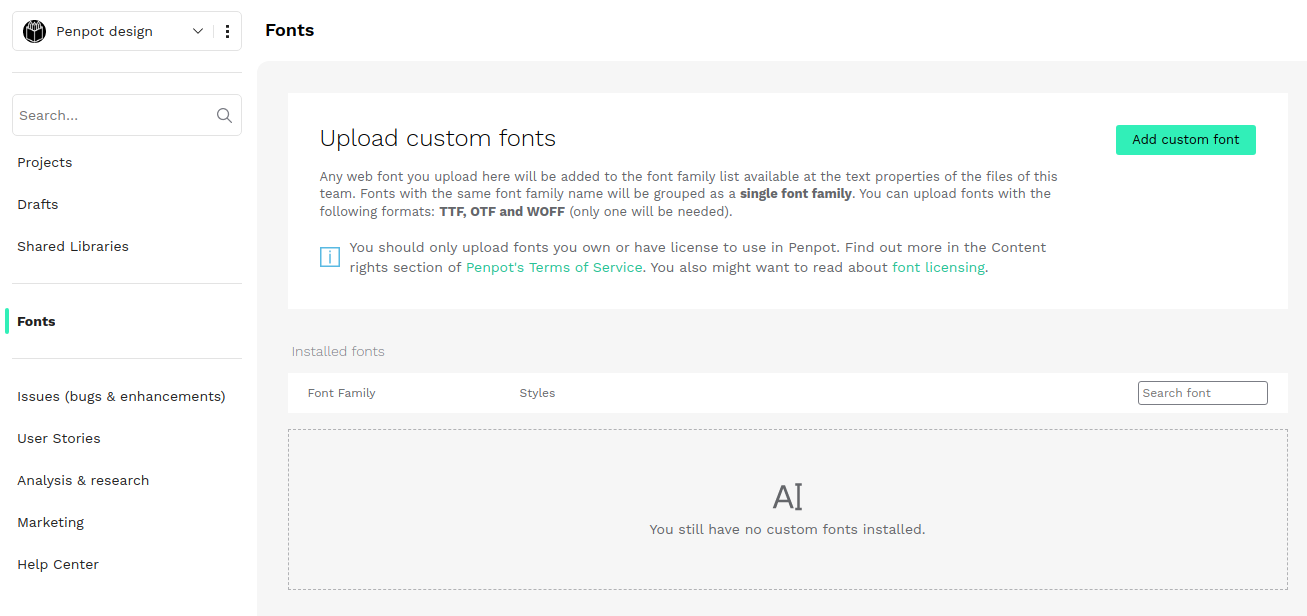
To upload a local font:
- Press “Add custom font”.
- Inspect your local files to select one or more fonts that you want to upload. You can upload fonts with the following formats: TTF, OTF and WOFF. Only one format will be needed.
- Change the font name if needed. The font name is the name that will be shown in the font list at the workspace. It is also what Penpot uses to group fonts in families. You can always edit it later.
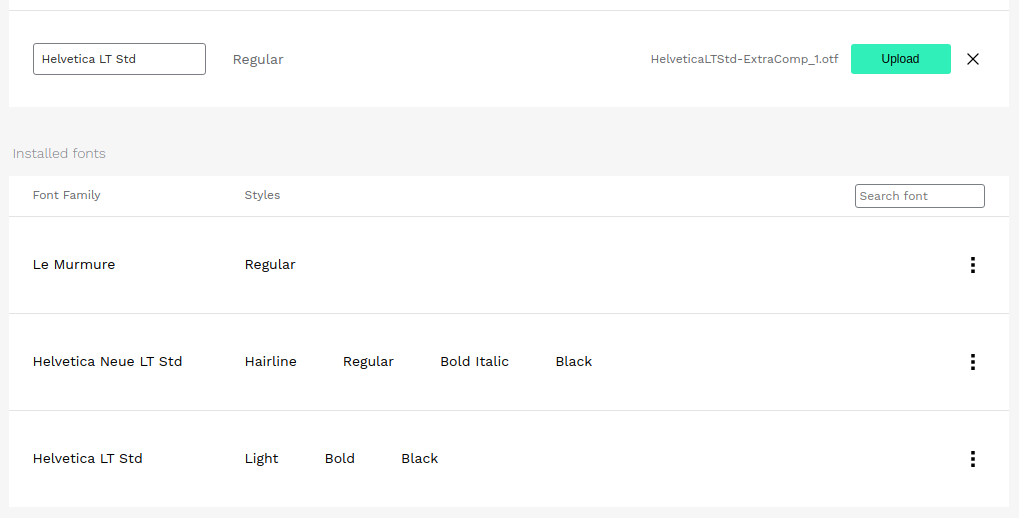
- Once ready, press upload. That's it. The font will be available at the font list of this team’s files.
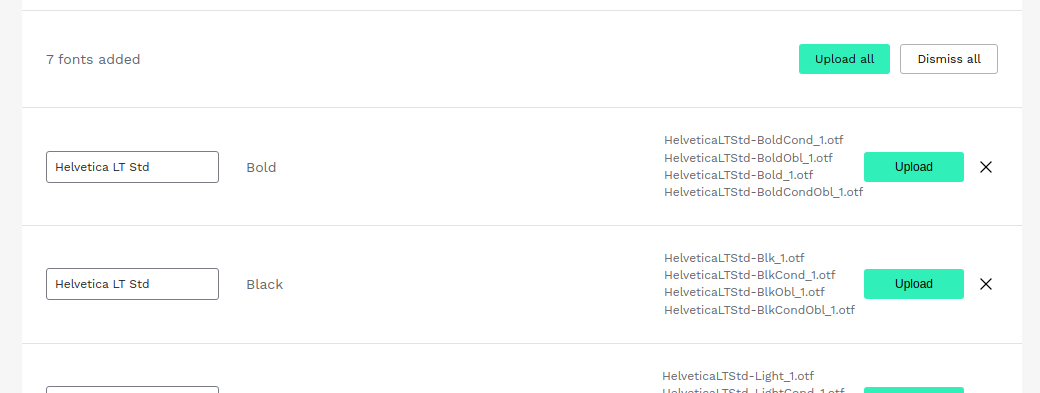
Group fonts in font families
Fonts with the same font family name will be grouped as a single font family. That means that at the font list that you will use at the files they will be shown as only one font with different variants available.
If you want to add a font variant (eg: Light) to a font family (eg: Helvetica) you only need to ensure during the upload process that it has the same font family name.
Edit custom fonts
At the right side of a font family of the custom fonts list you can find a menu that allows you to edit the name of a font family and delete it.
Using custom fonts
Custom fonts are added to the fonts catalog of a team and can be used at the workspace from the font list at the design sidebar.
Fonts Licensing and Usage
You should only upload fonts you own or have license to use in Penpot. Find out more in the Content rights section of Penpot's Terms of Service. You also might want to read about font licensing.